Get started
The Deploy option allows users to create DevPod instances using image templates, storage volumes and related configurations.
Configure DevPod
Planning an appropriate DevPod instance is a crucial step in deploying DevPod. The choice of GPU and storage volume can significantly affect the performance and efficiency of your project. This page provides guidance on how to configure the DevPod specifications. However, these are just general guidelines. Keep your specific requirements in mind and plan accordingly.
It's crucial to understand the specific resource requirements of a model. Usually, you can find detailed information in the model card's description on platforms like Hugging Face or in the config.json model file.
There are some tools that can assist you in evaluating and calculating the specific resource requirements of a model, such as:
Using these tools and resources should enable you to have a clearer understanding of what aspects need to be focused on in a DevPod.
Create a new DevPods
-
Navigate to DevPods and select + Deploy.
-
Select the region for deploying DevPod.
-
Specify a Network volume (optional).
-
Select an instance type. For example, H100 SXM.
-
Select an image (template).
-
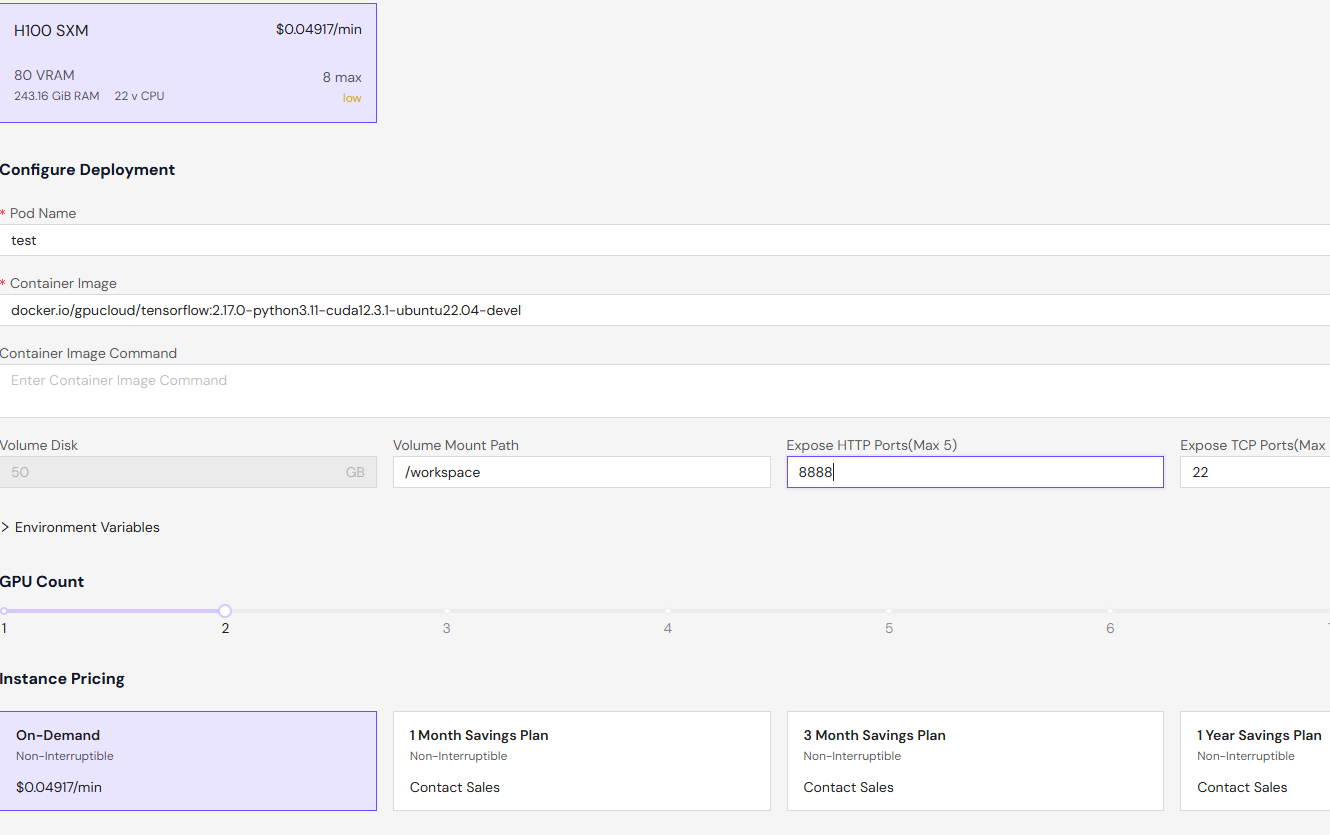
Configure the resources required for the normal operation of DevPod.
-
Review your configuration and select Deploy On-Demand.
Charges occur after the DevPod build is complete.
Access DevPod
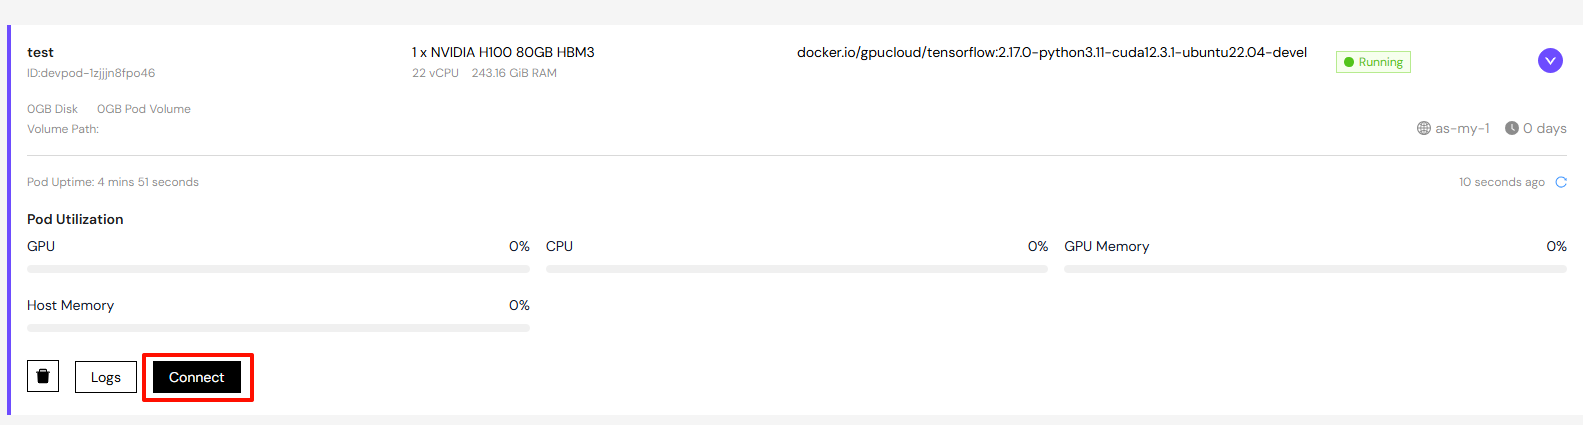
After creating a DevPod and waiting for the instance to operate normally, click on the drop-down box on the right side of the instance to display the details of the DevPod. Then click on the "Connect" button, and a display box will pop up. According to your needs, you can choose either HTTPS access or TCP (SSH) access or Web Terminal.
Frequently Asked Question
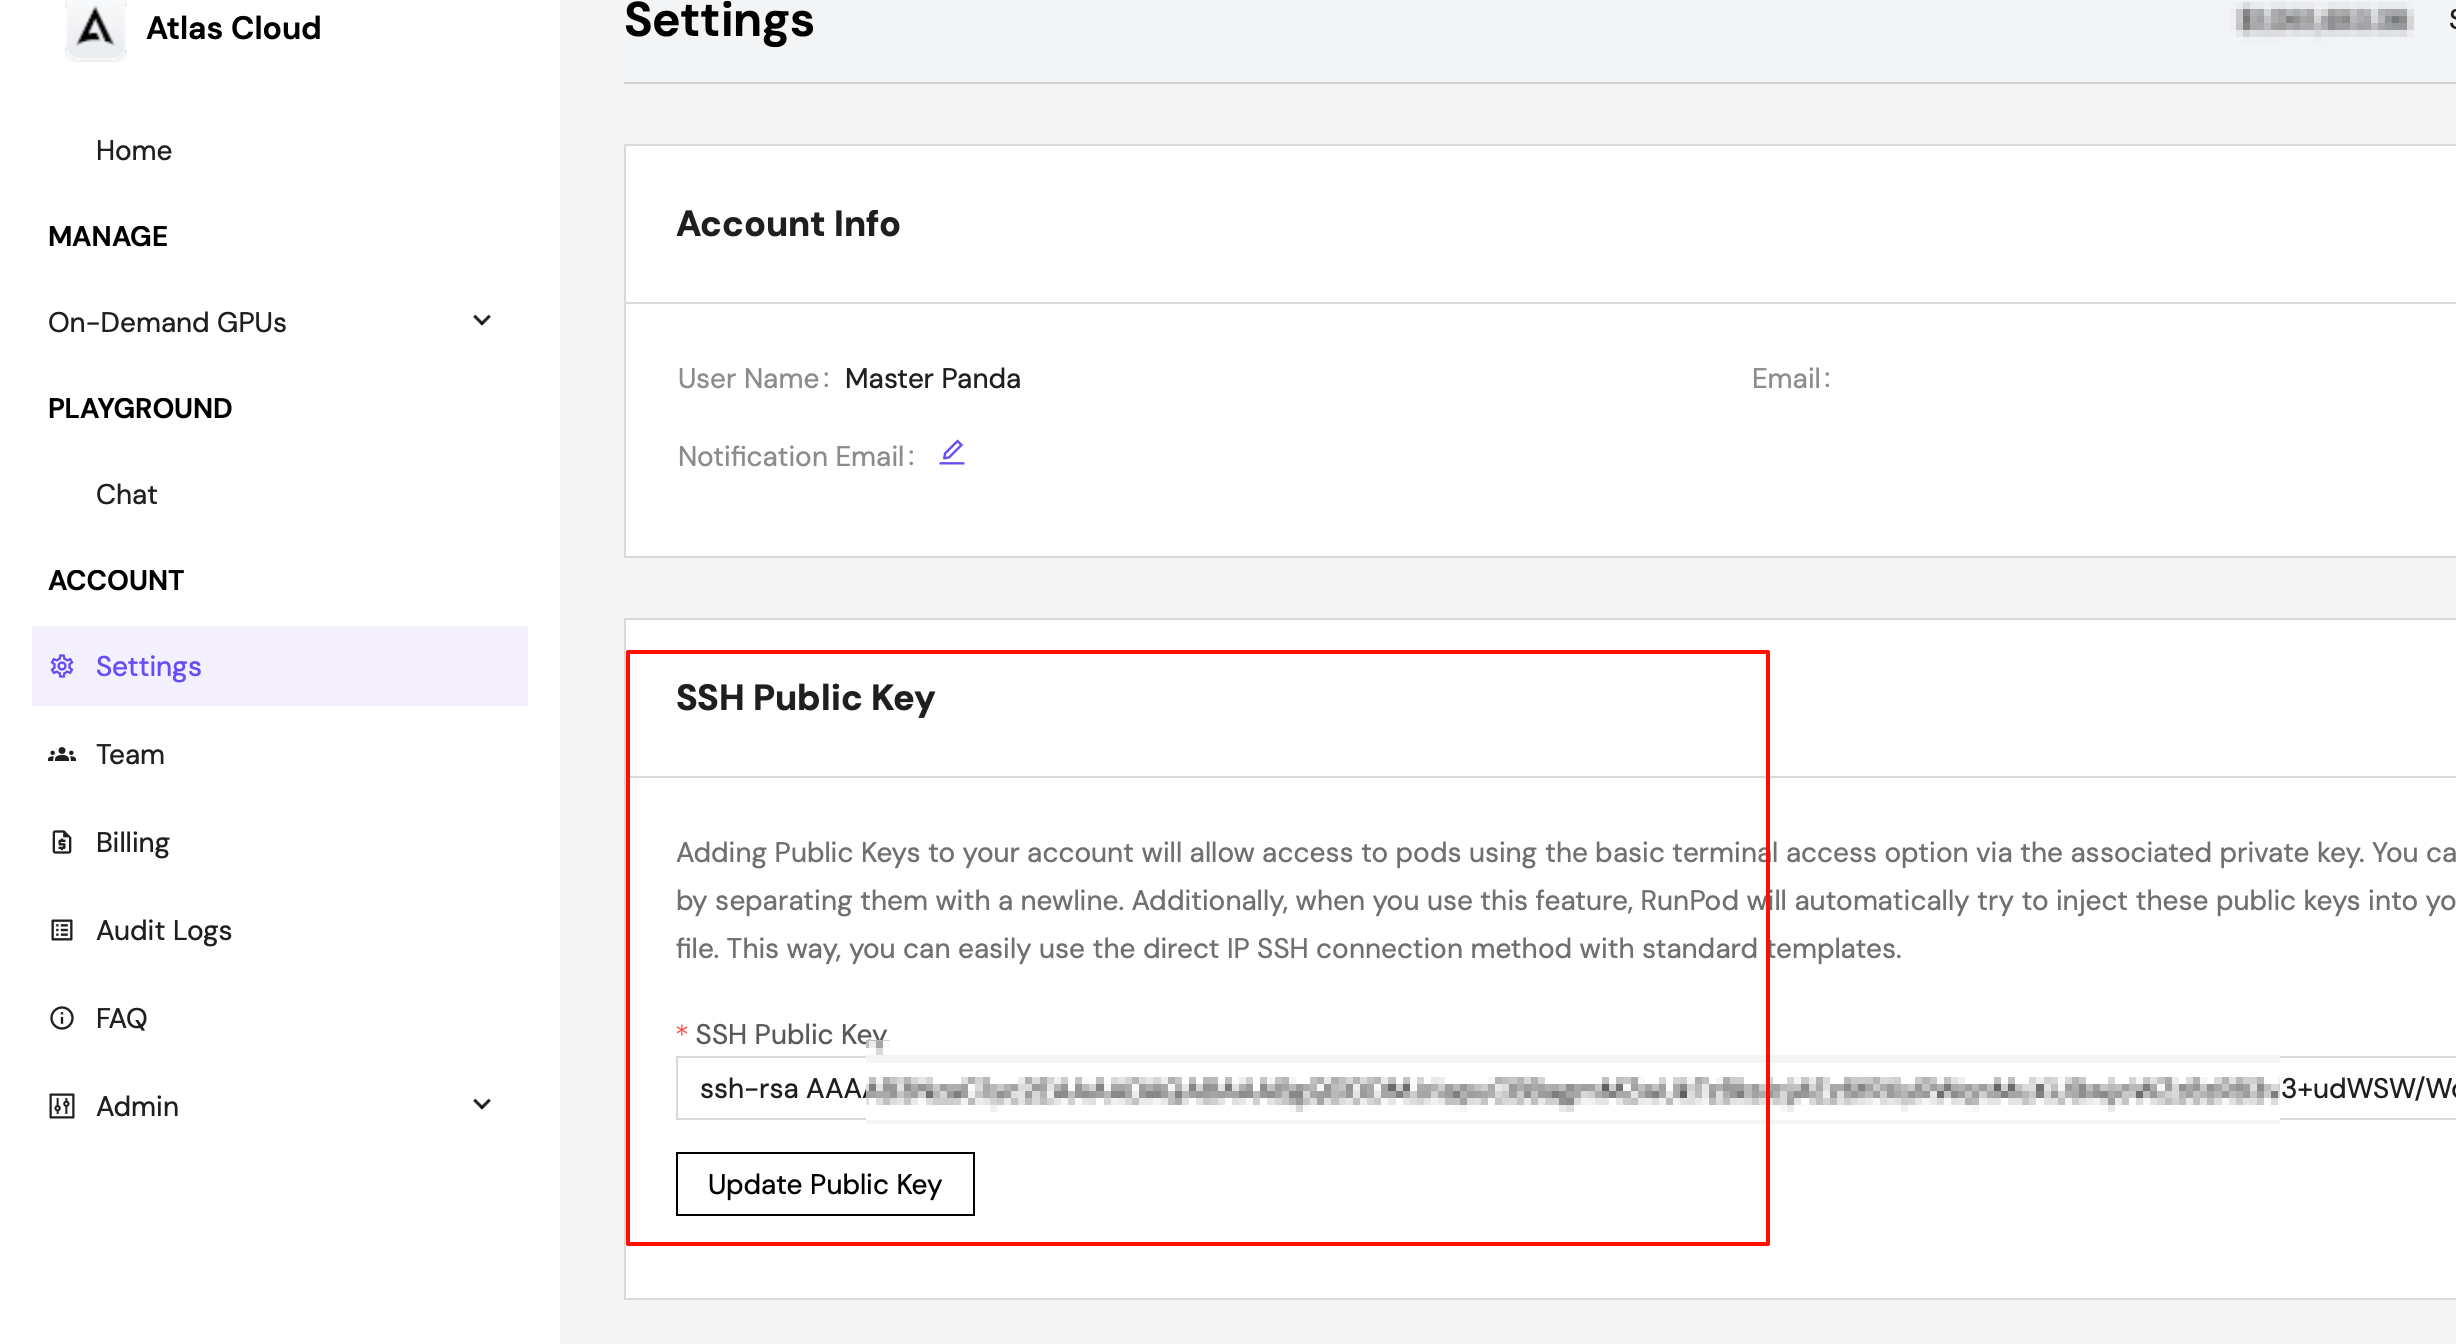
How to upload an SSH public key?
On the Settings -> SSH Public Key page, paste your public key and click Update Public Key to upload or update the SSH public key.
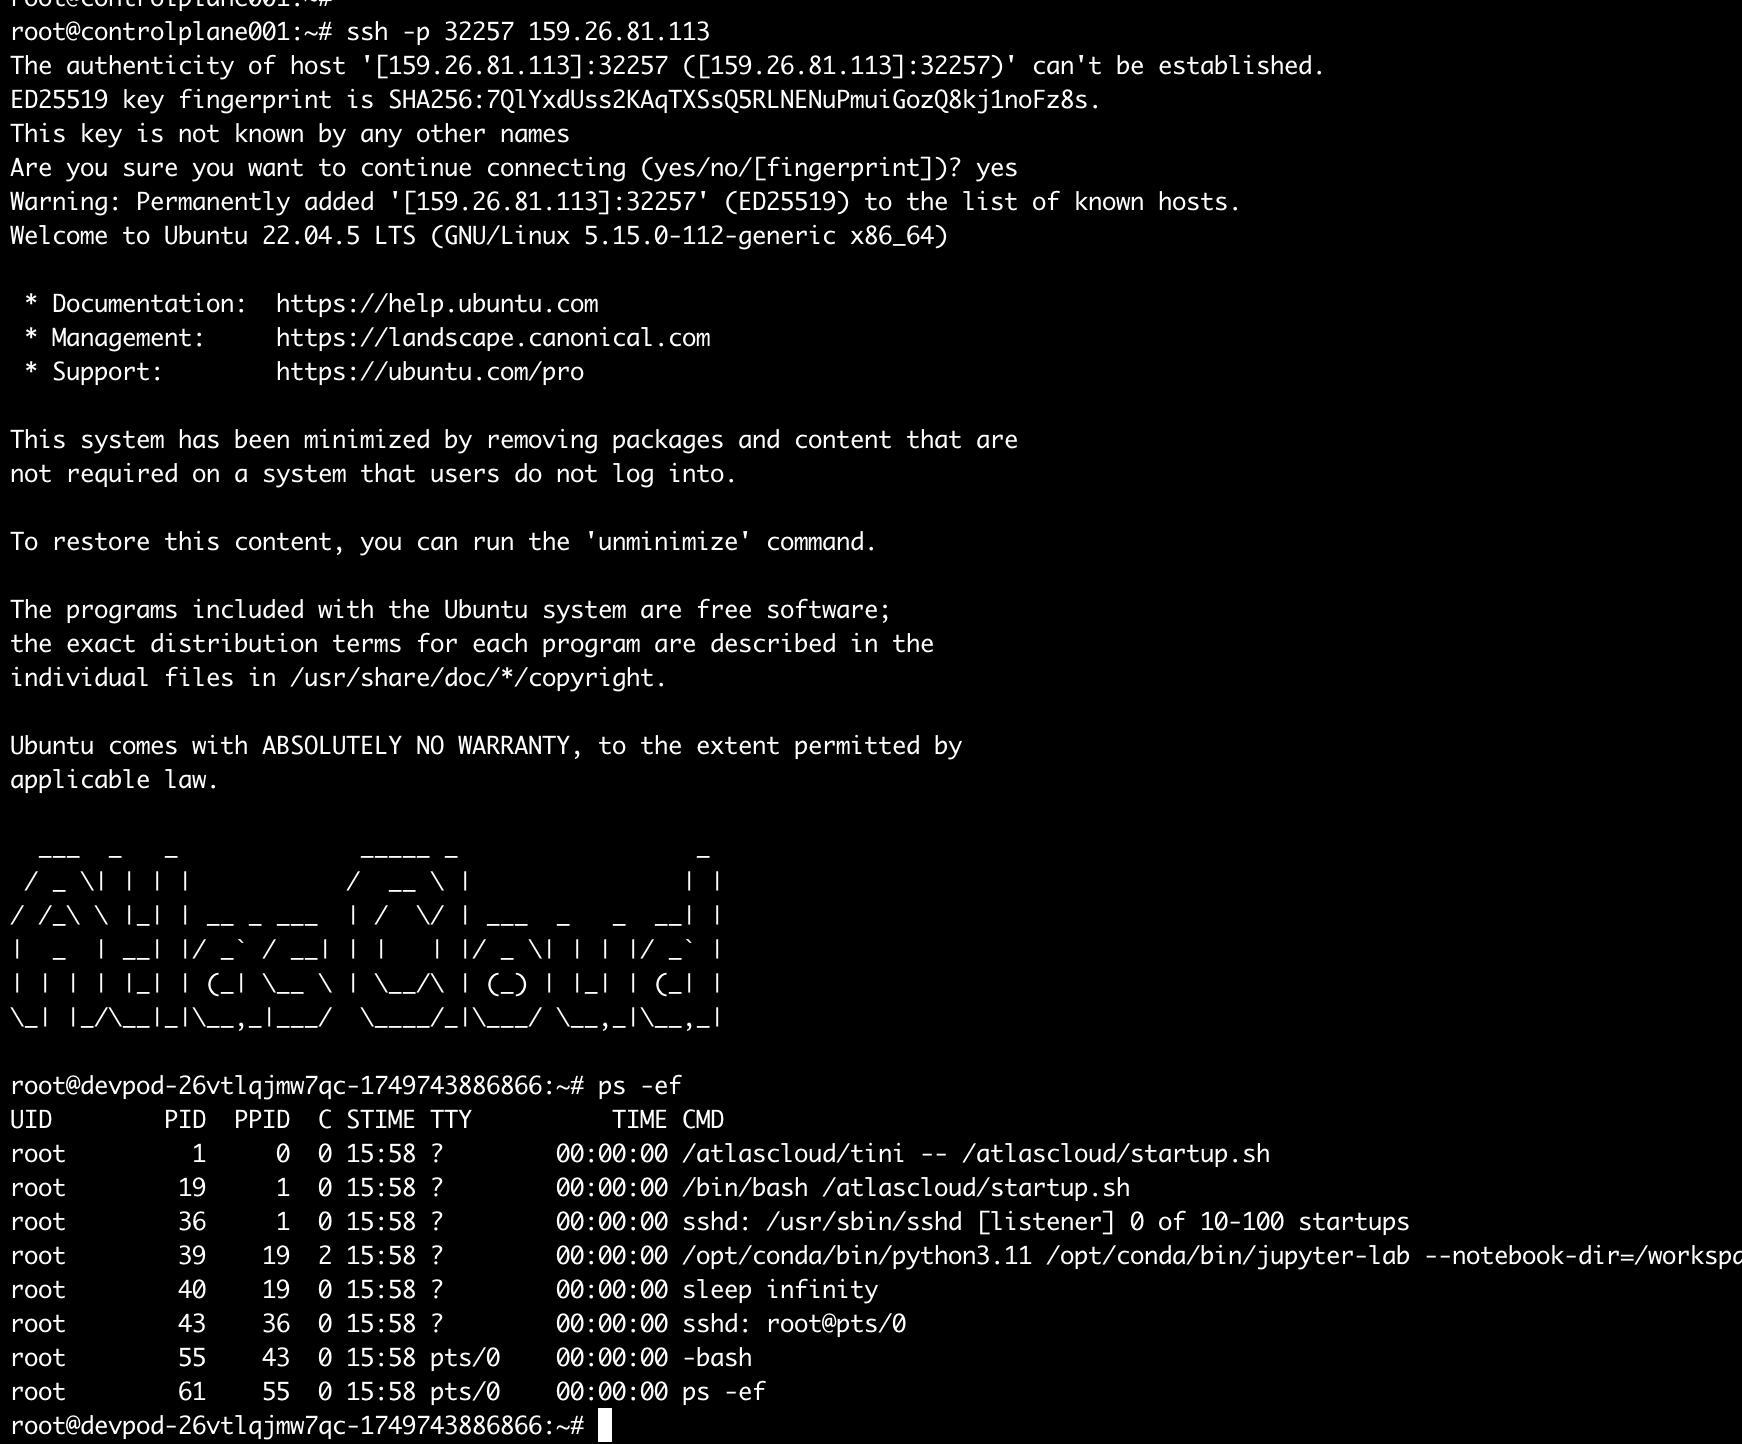
How to access via SSH?
For some images that support SSH access, and when SSH access is enabled during the creation of devpod, you can obtain the SSH access address in the Connect -> TCP Port Mappings pop-up window and access it via the ssh -p {port} root@{host ip} command, as shown in the figure below.
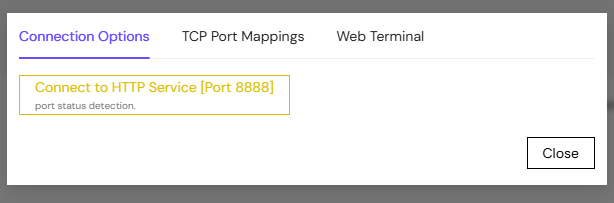
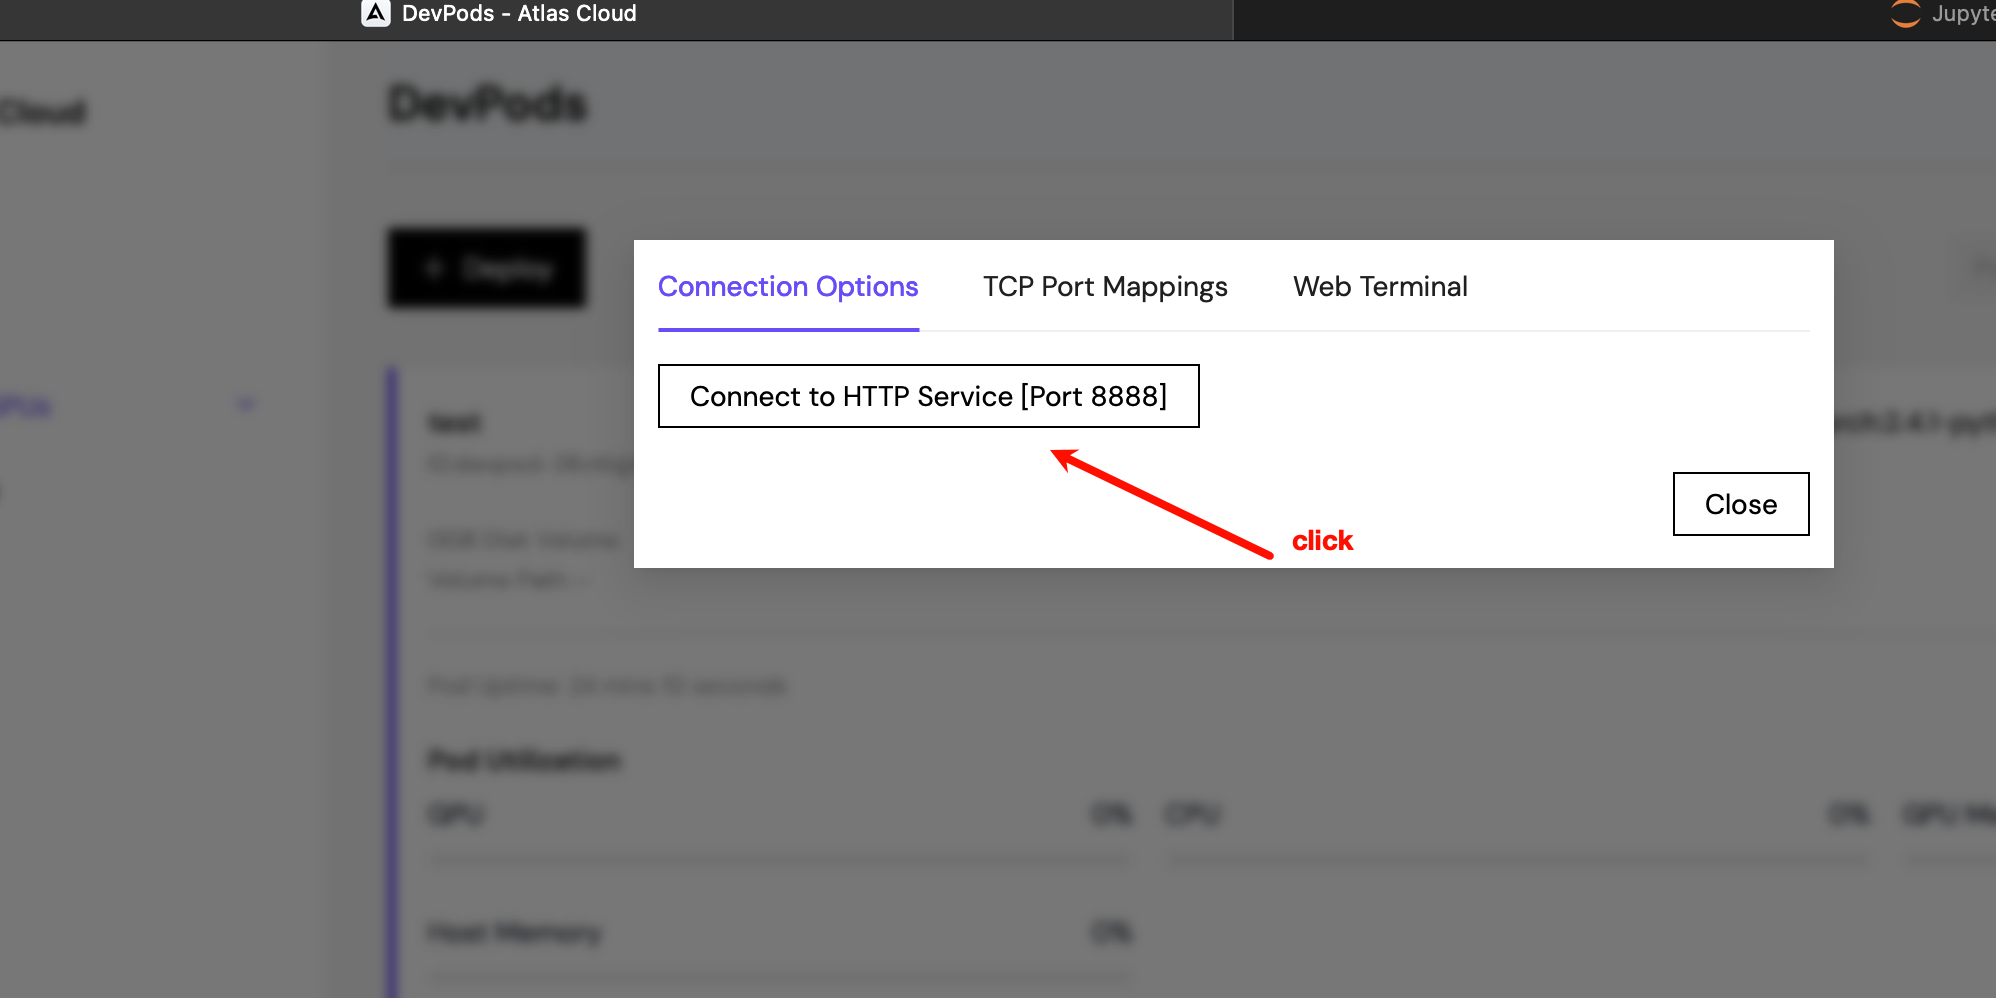
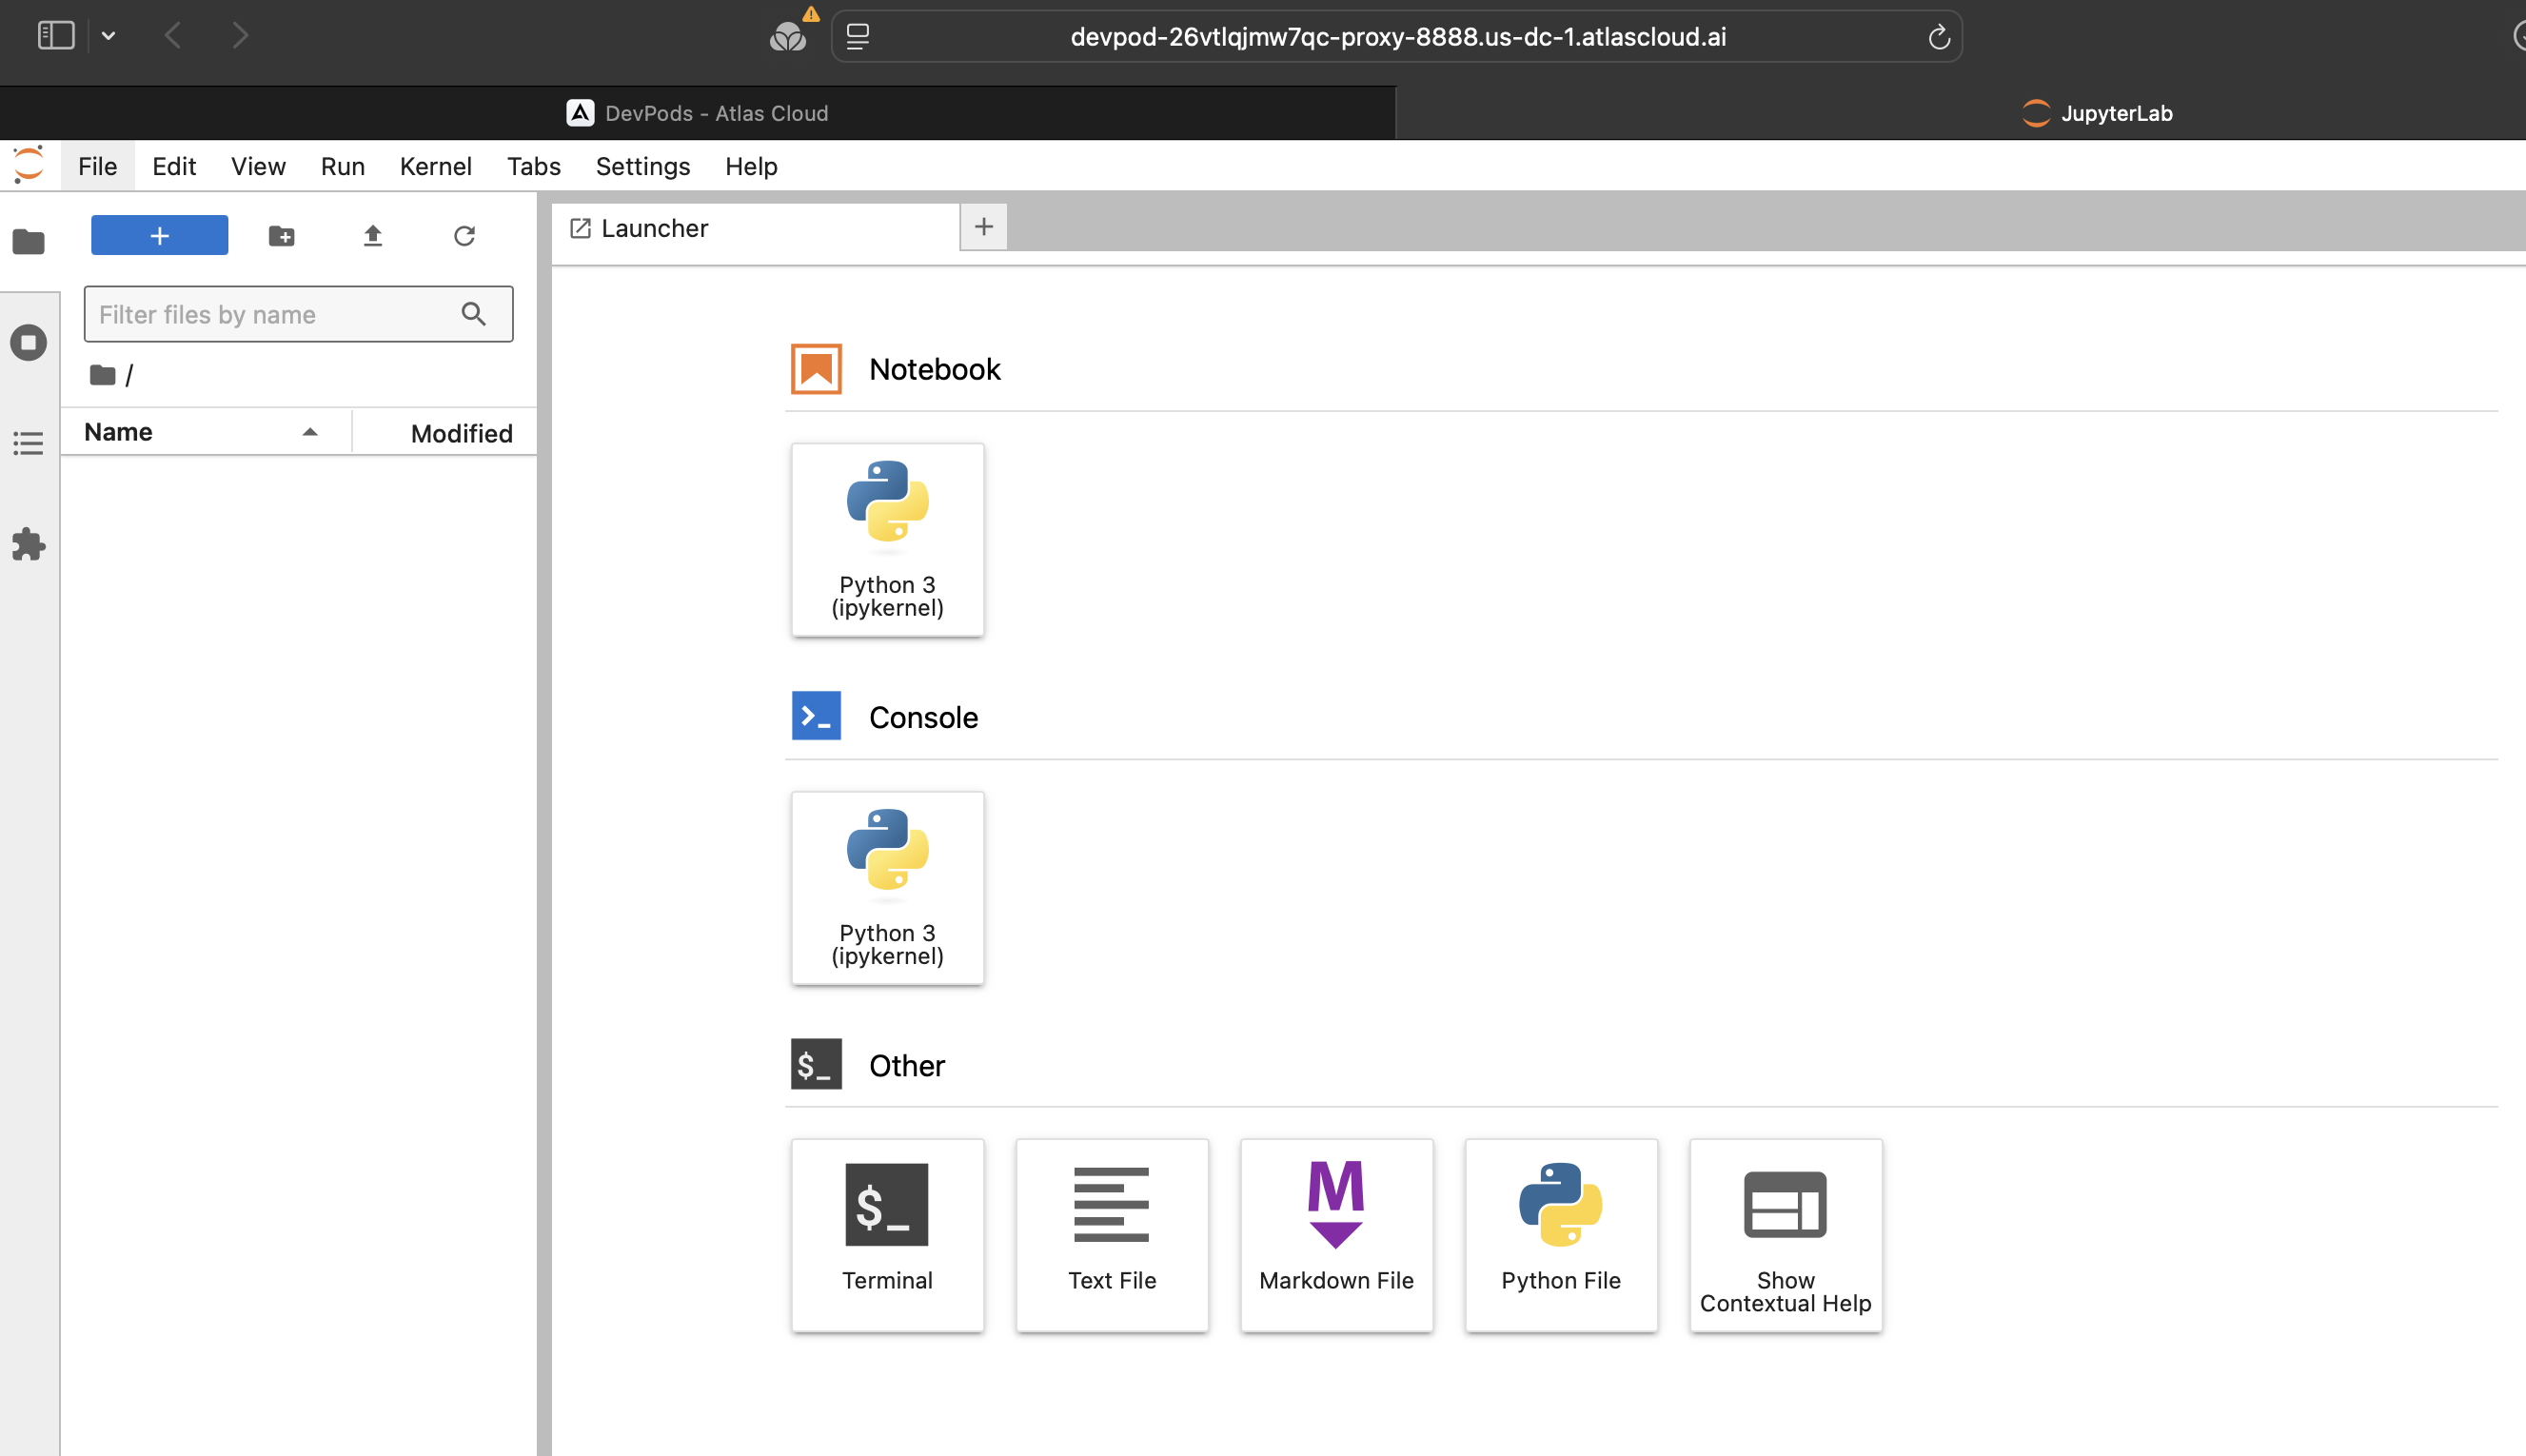
How to access via Jupyter?
For some images that support Jupyter access, and when Jupyter access is enabled during the creation of devpod, you can obtain the Jupyter access address in the Connect -> Connection Options pop-up window. Clicking the "Connect to HTTP Service [Port 8888]" button will redirect you to the Jupyter web page, as shown in the figure below.
How to expose HTTP or TCP ports
When creating a devpod job, you can fill in the HTTP or TCP ports to be exposed as needed. Multiple ports should be separated by ,, as shown in the figure below.

When creating a devpod, why is SSH Terminal Access and Start Jupyter Notebook sometimes disabled?
Currently, these two options are enabled for special images only, not all images. The supported images are as follows:
- docker.io/gpucloud/pytorch:2.4.1-python3.11-cuda12.4.1-devel-ubuntu22.04
- docker.io/gpucloud/pytorch:2.4.0-python3.11-cuda12.4.1-devel-ubuntu22.04
- docker.io/gpucloud/tensorflow:2.17.0-python3.11-cuda12.3.1-ubuntu22.04-devel
- docker.io/gpucloud/tensorflow:2.14.0-python3.11-cuda11.8.0-ubuntu22.04-devel
- docker.io/gpucloud/finetuning:axolotl-py3.11-torch2.6-cu12.4
- docker.io/gpucloud/finetuning:torchtune-py3.11-torch2.8-cu12.8
Additionally, enabling SSH Terminal Access requires uploading an SSH public key in advance.